
The last time I had a personal blog, about 7 years ago, I ran it with WordPress. However, after starting my new business, I hardly have the time to maintain my personal blog. Last year, the idea of running a new personal blog took root to my mind, but not by accident. After read several articles by Nathan Barry, founder of ConvertKit, and saw what he did during his journey, I found more resolve to run my new blog.
It's a good idea, but I already have a long history with WordPress. It is important that this time, the website is run differently, other than by WordPress. You might be thinking that I don't like WordPress, but I already have several websites running with WordPress. The real reason is that I love the idea of static websites like we used to have many years ago with Frontpage and simple HTML files. The best thing about static websites is that they are very light, safe, and with new tools and technology, very simple to publish and generate again.
If you want to know more about the benefits of a static site, I highly suggest you watch the Leon Stafford video on YouTube about "WordPress As A Static Site Generator." This doesn't mean I’m interested in using WordPress for my new blog. I did some research about whether the lightweight blog can run locally or on the cloud, use that for writing the new post and then get export and upload to host.
After several days (not full time), I found many options, ranging from WordPress on Docker to Ghost. But I found Ghost more beautiful and user-friendly for a personal blog. So, I started with Ghost and installed it on my Mac Pro. It's quite easy.
Install the Ghost
npm install ghost-cli@latest -gYou absolutely got to have Node and NPM installed on your machine prior to installing Ghost. You must then create a directory for your blog. For me it's rezamousavi.com
mkdir rezamousavi.comThen go to the directory and install Ghost locally.
cd rezamousavi.com

ghost install local
Output in my computer was something like this:
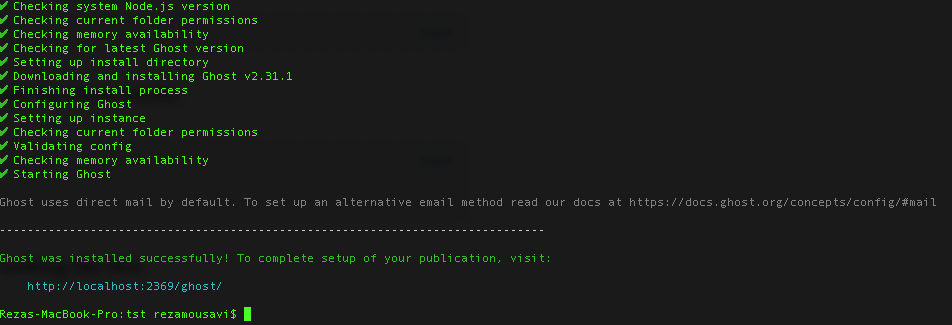
After that you can access your blog admin with address http://localhost:2369/ghost
You can also see your blog with address http://localhost:2369
The admin interface is very easy and straightforward, with many features, especially when writing your post. I'm in love with some of those features like insert code and images. You can find more about the editor features in the following link:

Admin area looks like this:
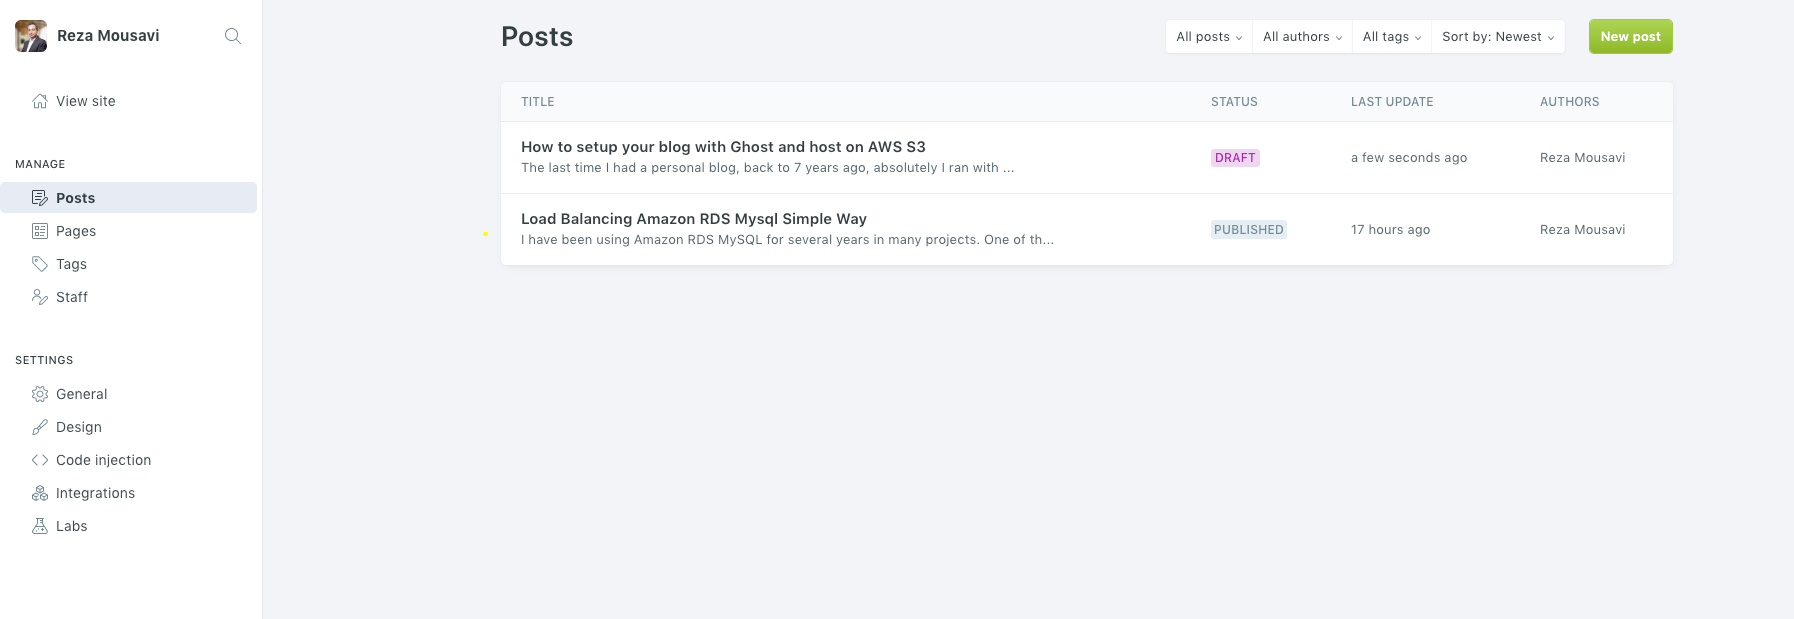
OK, let's finish talking about Ghost features. Now that we have a wonderful blog installed in our local machine, how can we upload it somewhere people can access it?
I don't want to sound like a broken record and rehash the articles and things you have already found on the internet. After several hours of research, I found that the Httrack could possibly help me create a static HTML and related resource in a folder, after which I can upload them to my web host. So, I decide to go with Httrack, but I don't like the comment tags added to my HTML files with Httrack, so I created a bash script and, with Perl’s search and replace command, removed all of them.
But wait, something’s wrong! Httrack did not download some pages. It seems Httrack can't download some pages and resources like images. It was weird each time I ran it. Sometimes it downloaded some files and other times download other pages randomly.
Finally, I decided not to continue with Httrack. So I’m stuck in step 2, created a blog locally, but can't generate static versions from that. Based on my experience with Nodejs and JavaScript, I decided to research write generators in Nodejs. After several hours of testing many libraries and sample codes, the following library eventually helped me solve the issue:
website-scraper
You can find more info about that library in the following page:

And with this code
const scrape = require('website-scraper');
scrape({
  urls: ['http://localhost:2368/'],
  recursive:true,
 urlFilter: function(url) {
    return url.indexOf('http://localhost:2368/') !==-1;
  },
  directory: './web',
  request: {
    headers: {
      'User-Agent': 'Mozilla/5.0 (Linux; Android 4.2.1; en-us; Nexus 4 Build/JOP40D) AppleWebKit/535.19 (KHTML, like Gecko) Chrome/18.0.1025.166 Mobile Safari/535.19'
    }
  }
});
The above code will connect to http://localhost:2368/ and download all HTML and related resources in the web folder. Also, in urlFilter make sure to never leave it with an external link.
Great, now we have all the files and resources in the web folder, without any problem. But some things still need to change. All the URLs in HTML pages and resources pointed to http://localhost:2368, so I have to search and replace them in all HTML pages. This bash script finally generates a folder from my blog and also replaced all URLs automatically.
#!/bin/bash
rm -rf web
node index.js
cd web
perl -pi -w -e 's{http://localhost:2368}{https://www.rezamousavi.com}g;' *.* `find ./ -name *.html`
Now, I have everything locally, but there are a few more steps we have to take. Based on my experience with AWS S3, I decided to use the S3 as my website web server. AWS S3 has a feature called "Static website hosting"; it can be used as a web server for serving static files. It can't run any server-side script. It's the best option for my needs and also very cheap. First time I saw this feature used was in Dr. Werner Vogel’s blog ‘All Things Distributed.’ He's the CTO of AWS.
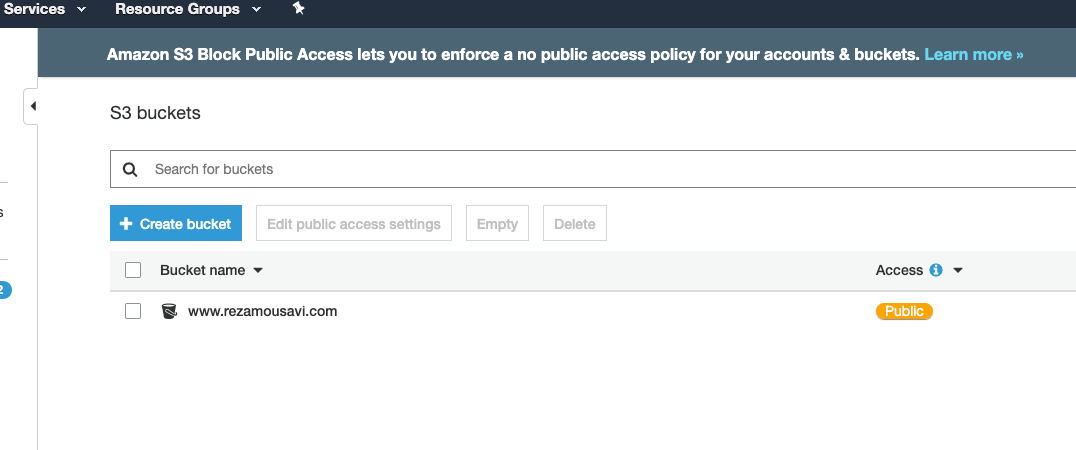
OK, to create the S3 bucket, you can use the AWS CLI (command-line tools), or you can use the Graphic User Interface, whichever one you are more comfortable with. I usually go with the GUI. I have to create a bucket with the name of my website, so my bucket’s name is www.rezamousavi.com.
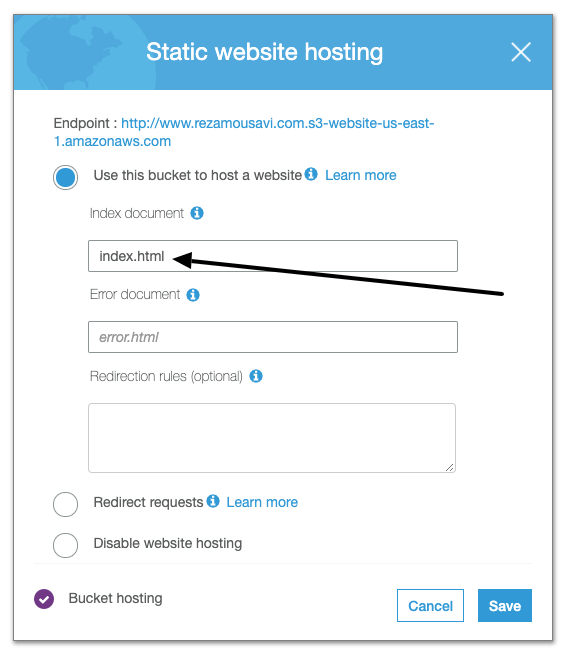
Next, I enable "Static website hosting" for my bucket. For this, click on the bucket, select Properties, and then click on the "Static website hosting" section.
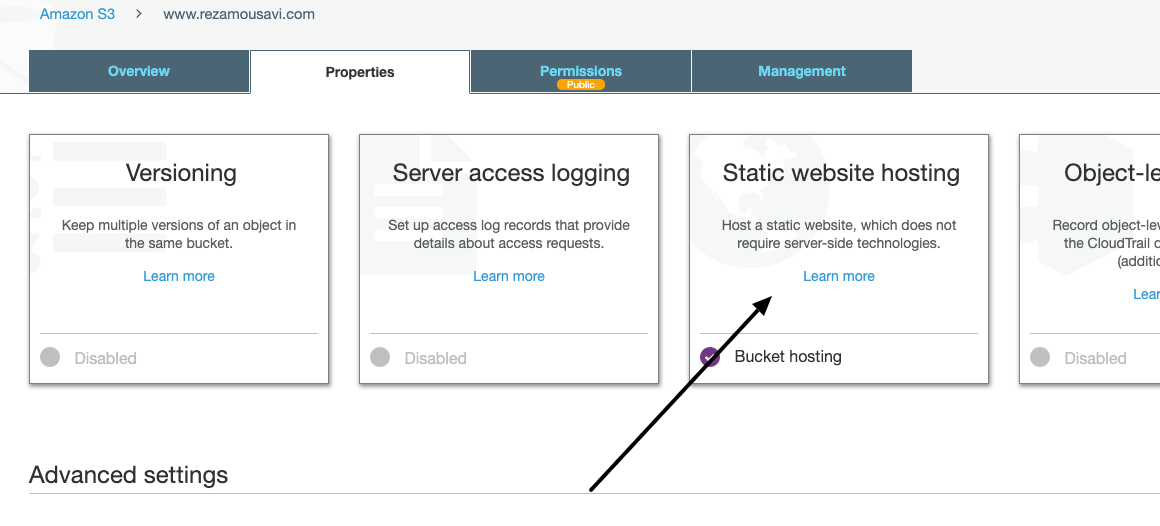
Then, enter the index.html as the default document and click on save.

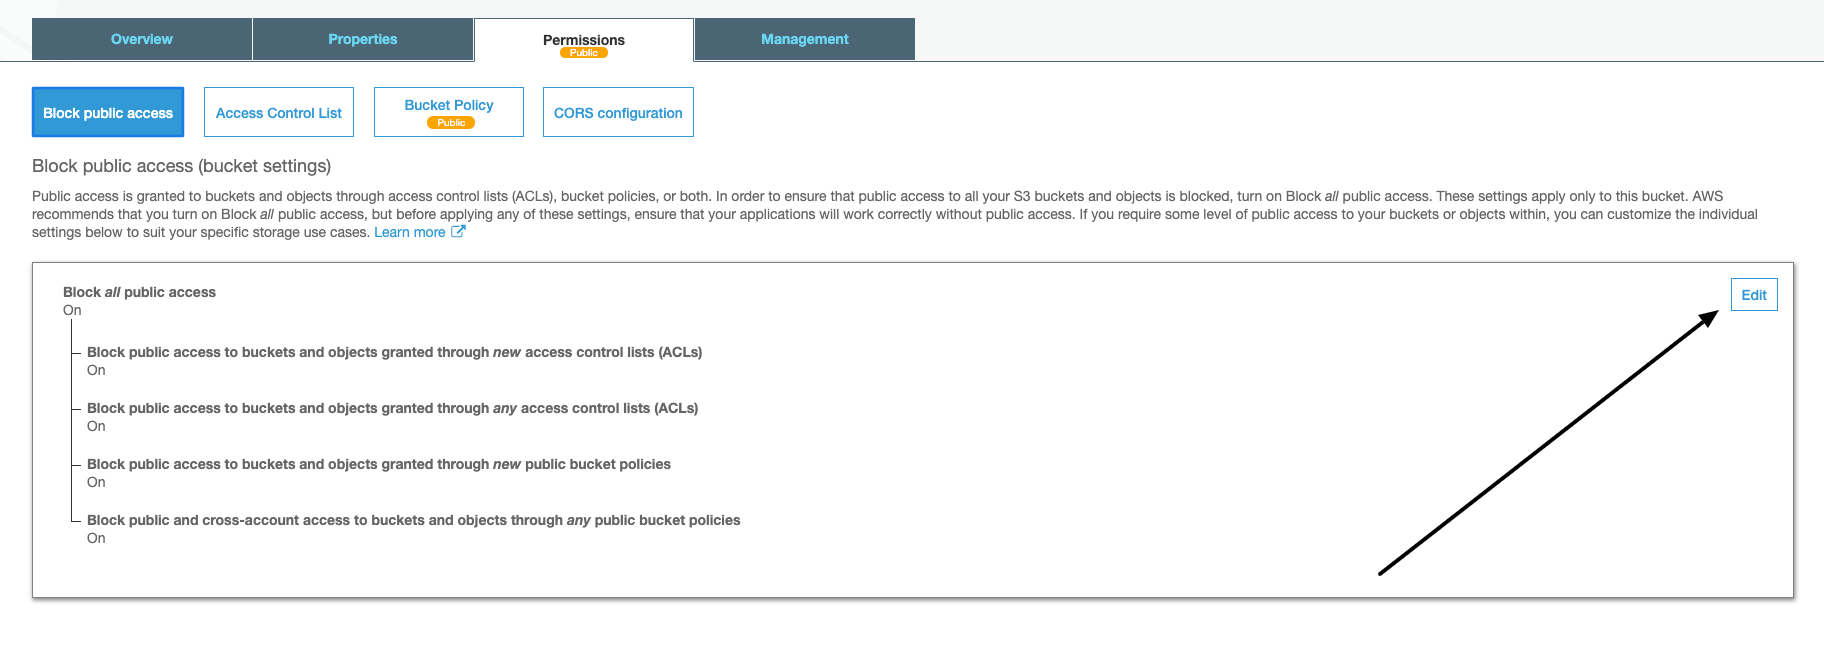
Click on the permission tab and click the ‘Edit’ button in Public Access to turn it off.
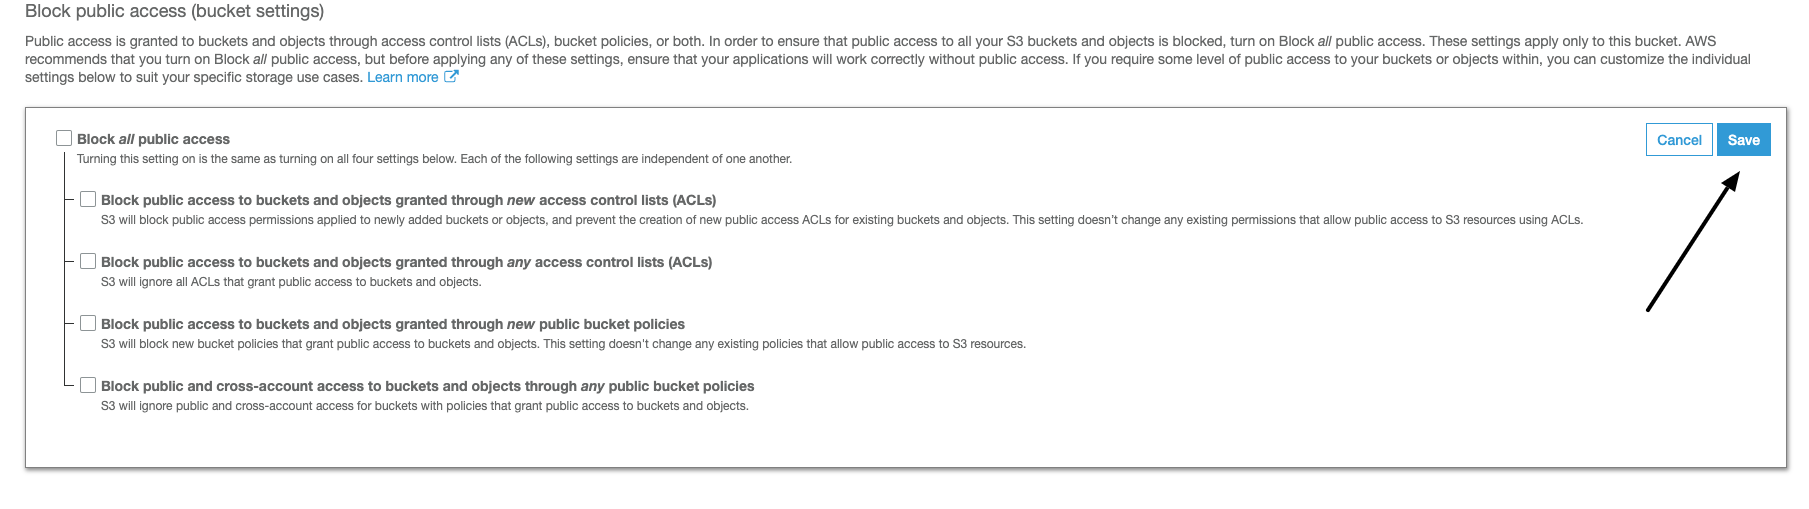
Uncheck "Block all public access" and click on save button.
Then click on "Bucket policy" and copy and paste the following policy:
{
    "Version": "2012-10-17",
    "Statement": [
        {
            "Sid": "PublicReadForGetBucketObjects",
            "Effect": "Allow",
            "Principal": "*",
            "Action": "s3:GetObject",
            "Resource": "arn:aws:s3:::www.rezamousavi.com/*"
        }
    ]
}
Click on the Save button. Now our bucket data should be available by bucket public URL. But first, we need to copy our blog files into the bucket, and then from section "Static website hosting," you can find the URL.
So, by entering the http://www.rezamousavi.com.s3-website-us-east-1.amazonaws.com in my web browser, I can see my blog. But because the URL is different (seeing as the current URL is not the final URL), some resources such as images or CSS files can't load correctly. Just make sure you can see our plain page and structure.
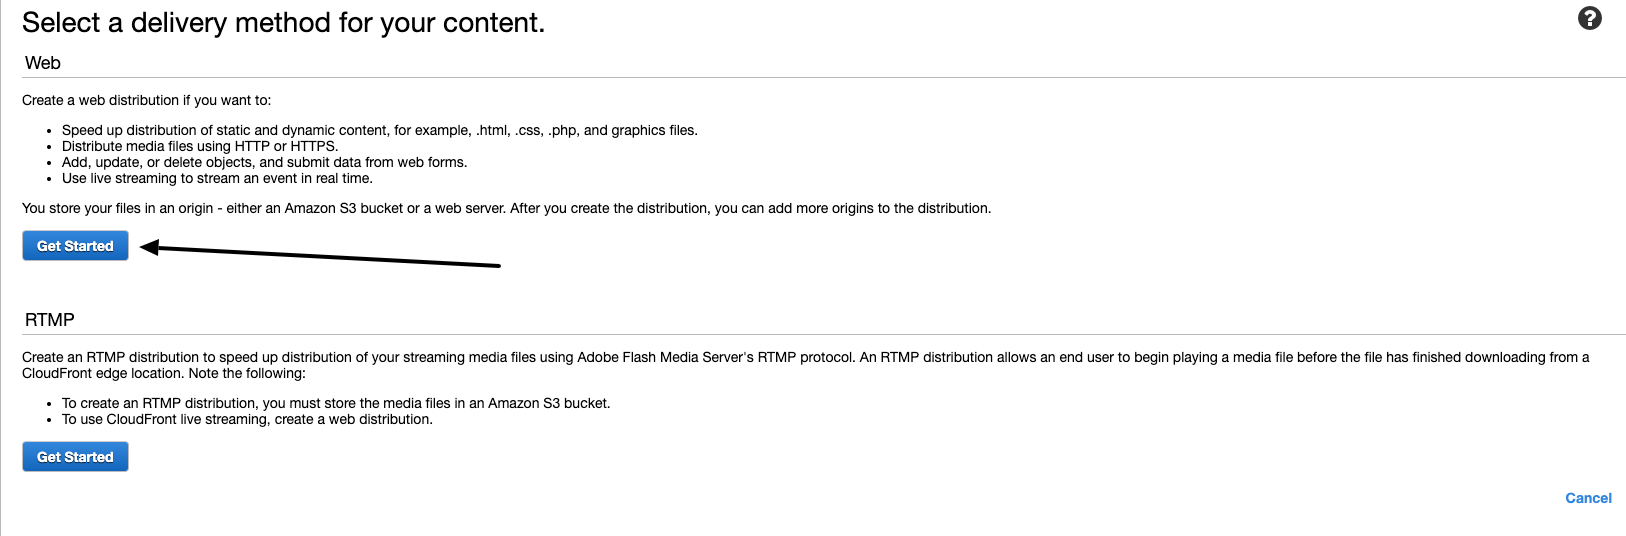
Next, we need to create A CloudFront distribution for our blog. It helps our blog loads faster. So go to CloudFront’s admin page and click on the "Create Distribution" button. Then click on "Get started" in the Web section.
In the next part, you have to enter your S3 public URL in the "Origin Domain Name" field. By default, CloudFront shows your S3 as a first item, but don't click on that. Copy the S3 public URL instead.
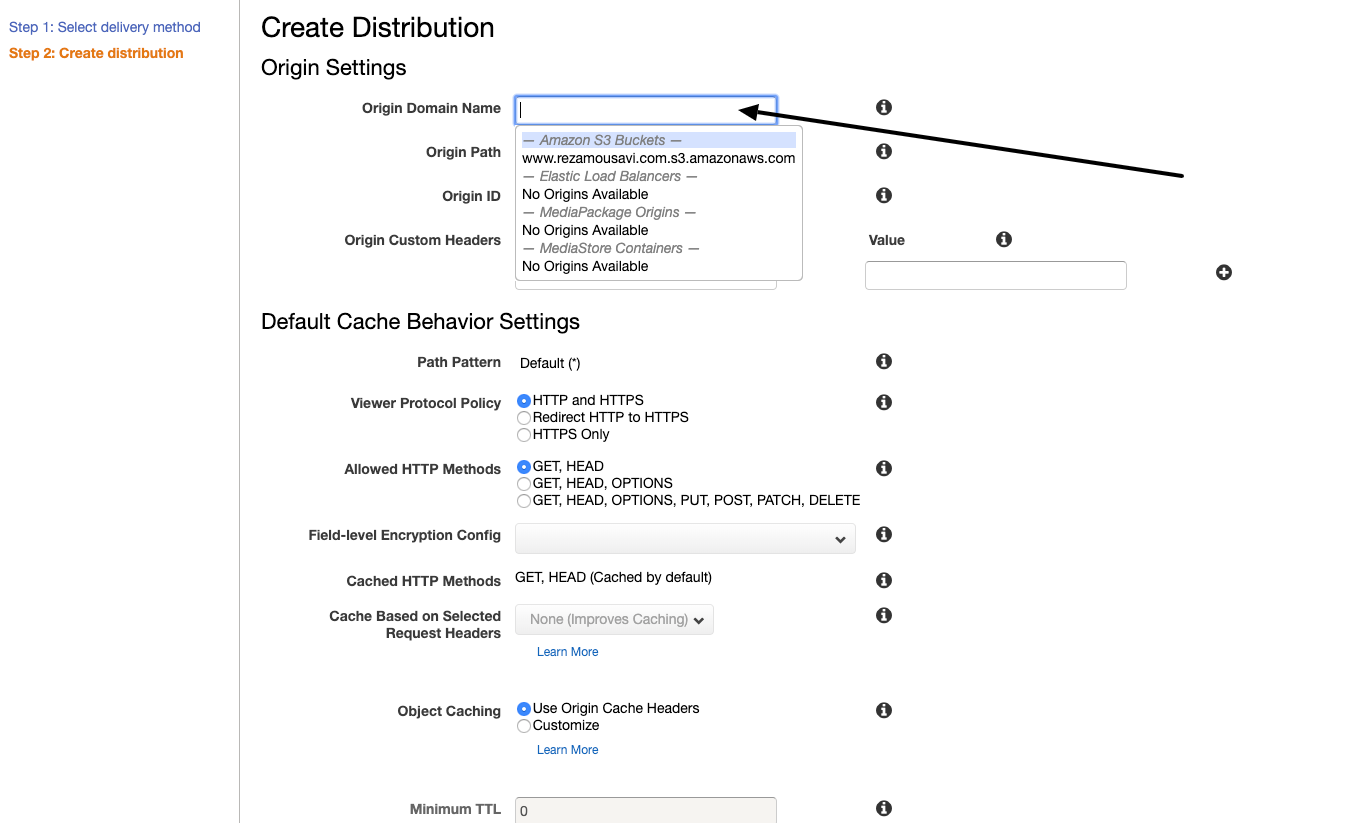
My S3 public URL is "http://www.rezamousavi.com.s3-website-us-east-1.amazonaws.com/", so I paste this, and then I scroll down and click on "Create Distribution" button at the end of the page.

After creating the CloudFront distribution, it has a URL like this "d19znvvstakucj.cloudfront.net", so by entering this URL in our web browser, we should see our blog page in 10 minutes.

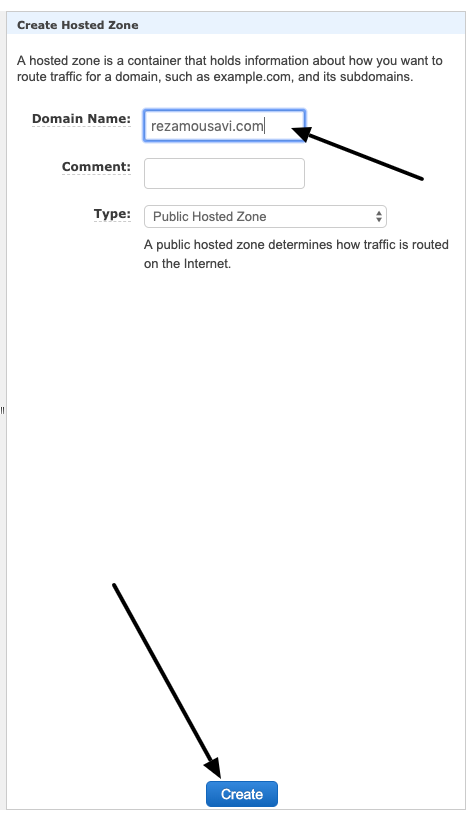
Now, we have to set up our Domain Name System. For DNS service, I prefer Route53. Open Route53 admin and click on the "Create Hosted Zone" button.

Then enter your domain name, mine is "rezamousavi.com" and then click on the "Create" button at the bottom of the page.
Next, we have to update our DNS. If you registered your domain with AWS, it's easy, and you can update it from Route53. If you registered your domain with any other registrant, log in to your domain control panel and update your domain DNS to the provided DNS name by Route53. Mine are:
ns-1168.awsdns-18.org.
ns-1743.awsdns-25.co.uk.
ns-243.awsdns-30.com.
ns-887.awsdns-46.net.

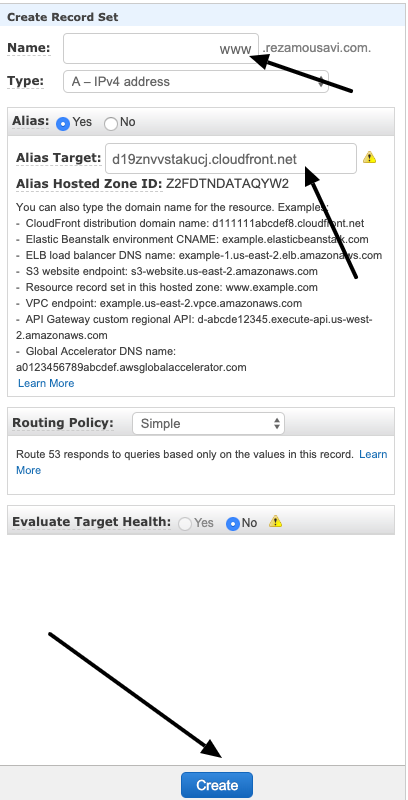
You can find it in your Created Zone. Next, we have to create an A-record for our domain to point it to the CloudFront distribution we previously created. Click on "Create Record Set" and then select A - IPV4 address and enter “www” in the Name field. Set Alias to yes and copy and paste our CloudFront distribution in the "Alias Target" field. Click on the "Create" button at the bottom.
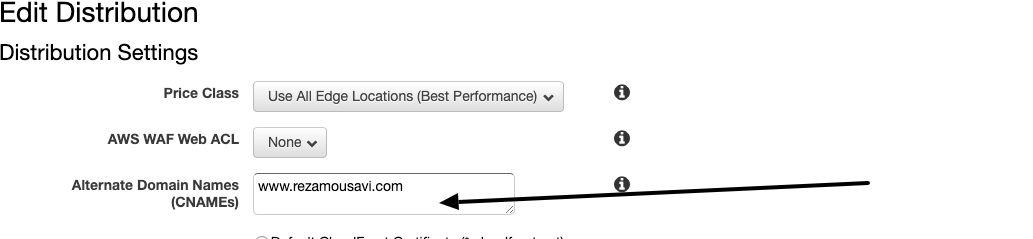
Next, we have to go back to CloudFront to update our distribution settings. Click on your distribution name and then click on the "Edit" button.
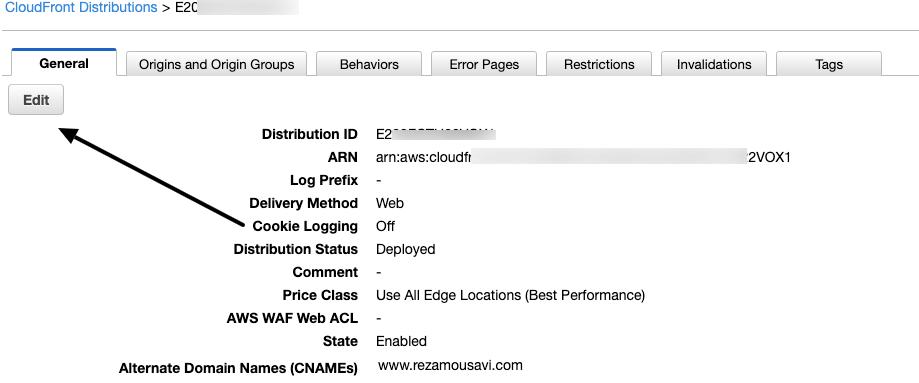
Next, enter your domain name here, then click on the "Yes-Edit" button at the bottom of the page.
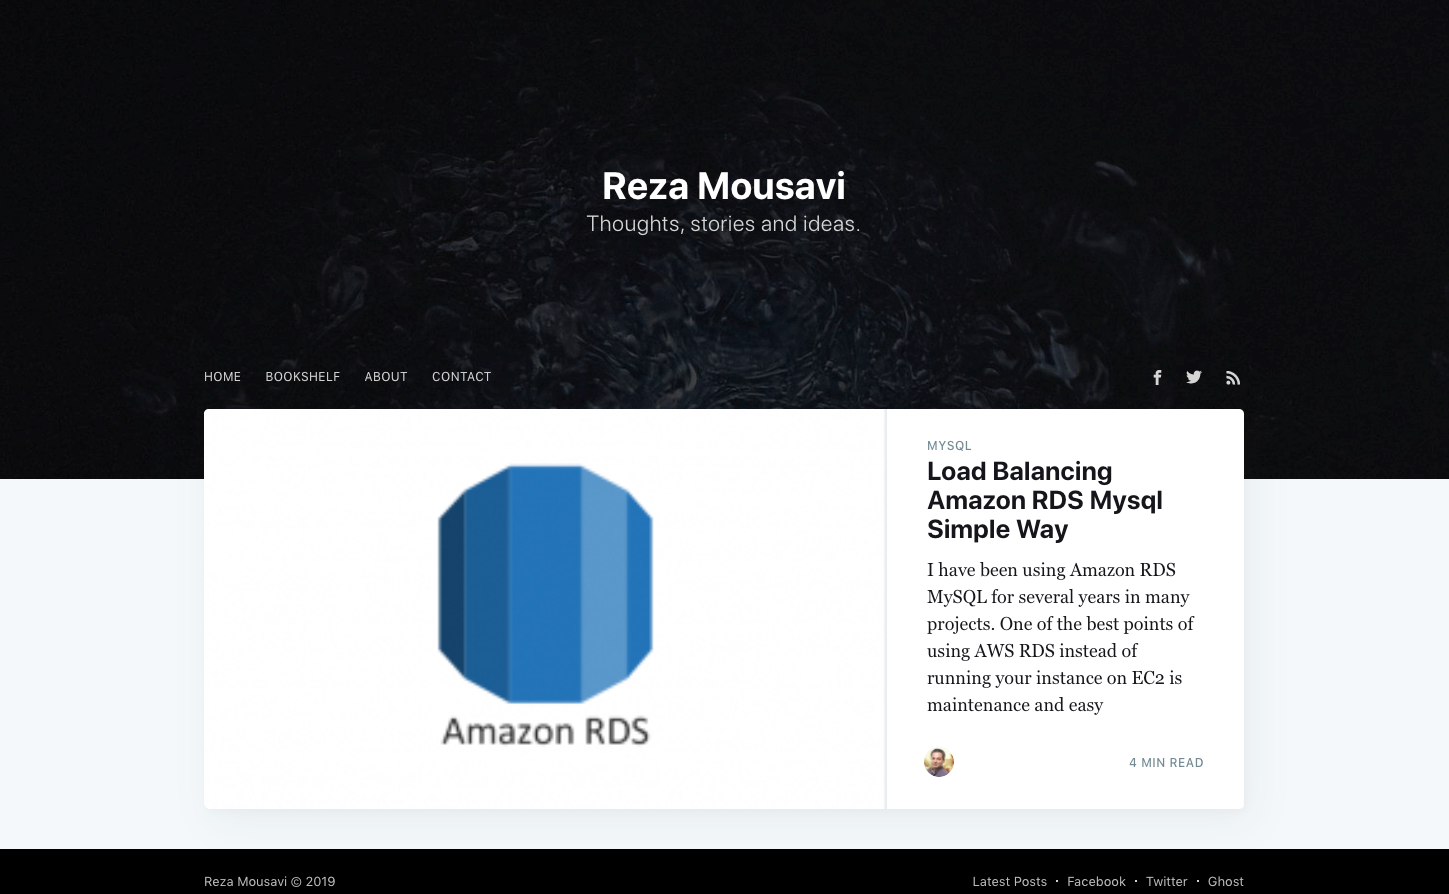
After 10 minutes, you can see the blog by entering the URL in your browser. Mine: https://www.rezamousavi.com
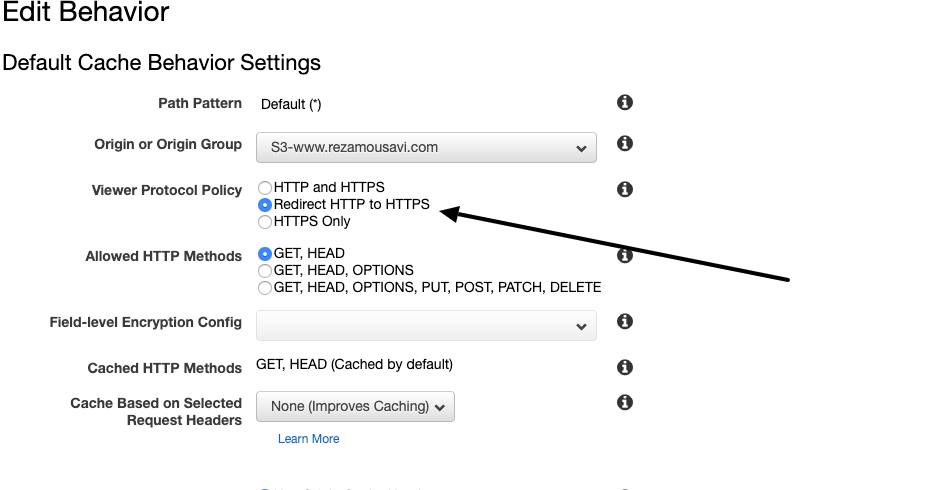
You also have option for https or http access in your CloudFront distribution settings.
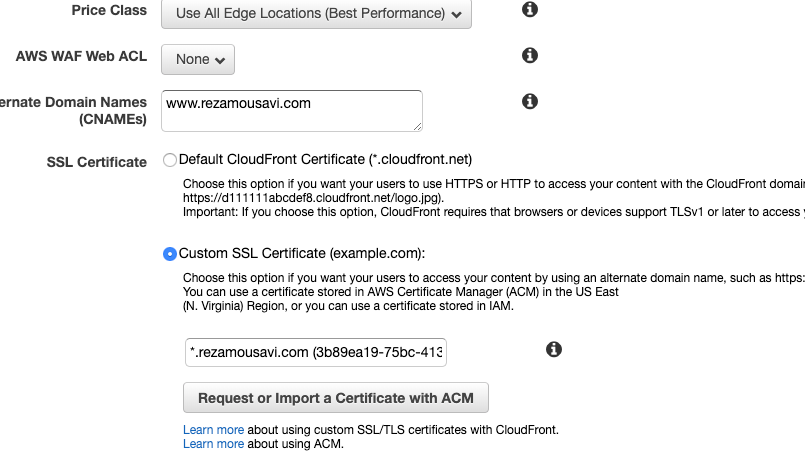
You can also use AWS "Certificate Manager" to create SSL for your blog and assign it to your blog in your CloudFront settings.
OK, let's summarize what we’ve done so far:
1-Run Ghost locally.
2-Generate a static version from our local blog with our Nodejs script.
3-Create S3 bucket and make it public with the Static website hosting feature.
4-Upload our blog static files to the S3 bucket.
5-Create CloudFront distribution for our S3 bucket.
6-Create a Zone for our domain name and set ‘recordset’ to link our CF distribution.
7-Update our domain DNS records.
It looks like we are good to go. However, with this, we need to upload the files afresh after each new post or change in your blog, which can be tedious. Luckily, some automation can make life easier. Let's do implement them.
First, install the AWS cli tools in your computer and config it. You can find a lot of articles and documents on the web for this. For Mac computers, you can read the following article:
 Amazon Web Services
Next, you need to create an IAM user and policy to gain access to the S3 bucket we created before to upload files automatically.
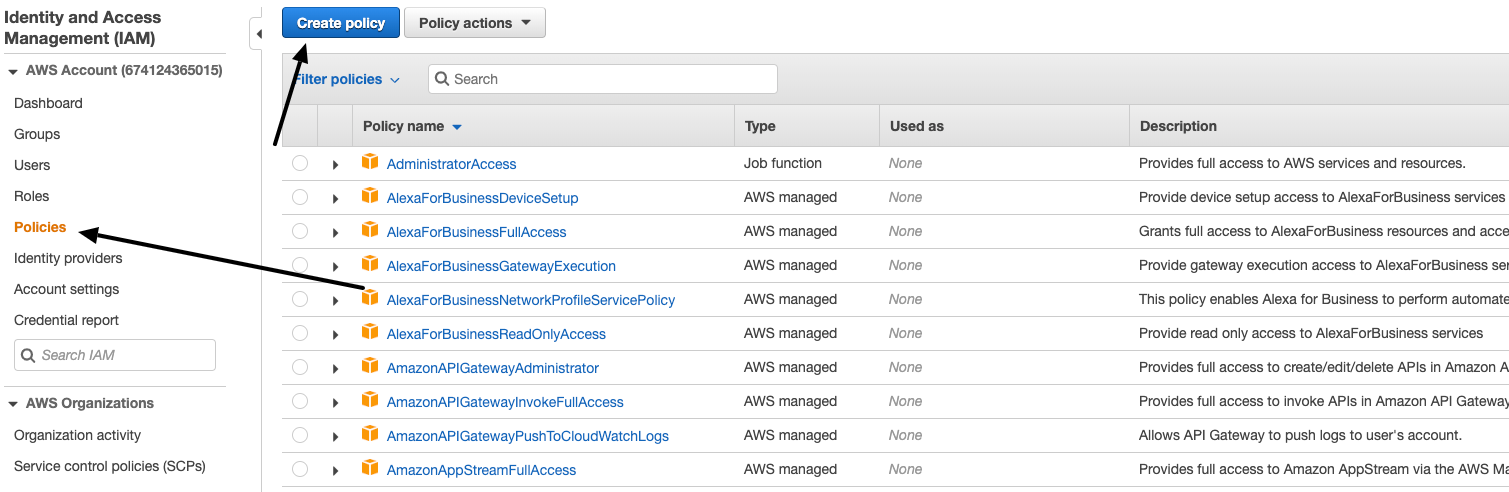
First, go to the IAM management console, click on "Policies" on the left side and then click on the "Create Policy" button.
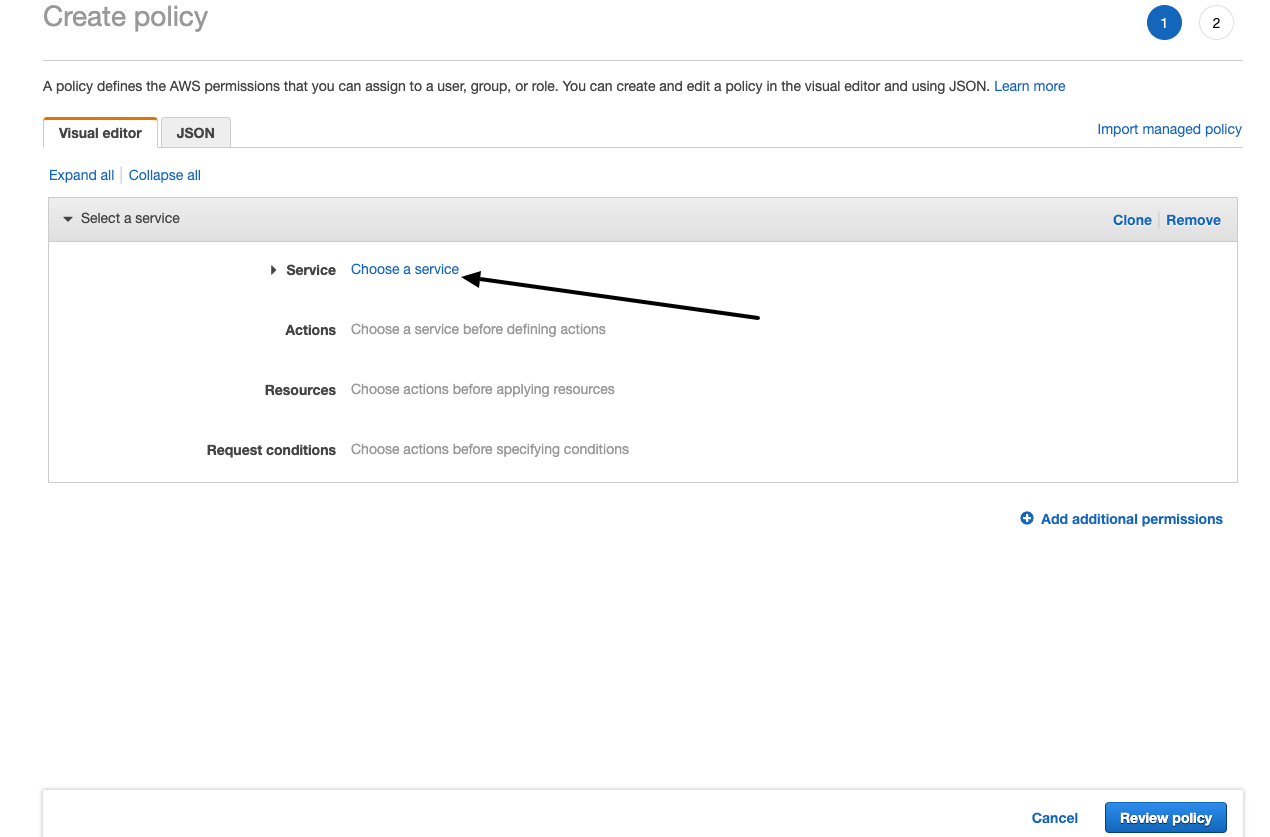
Then click on "Choose a service" and search and select S3 service.
The click on "Action" section
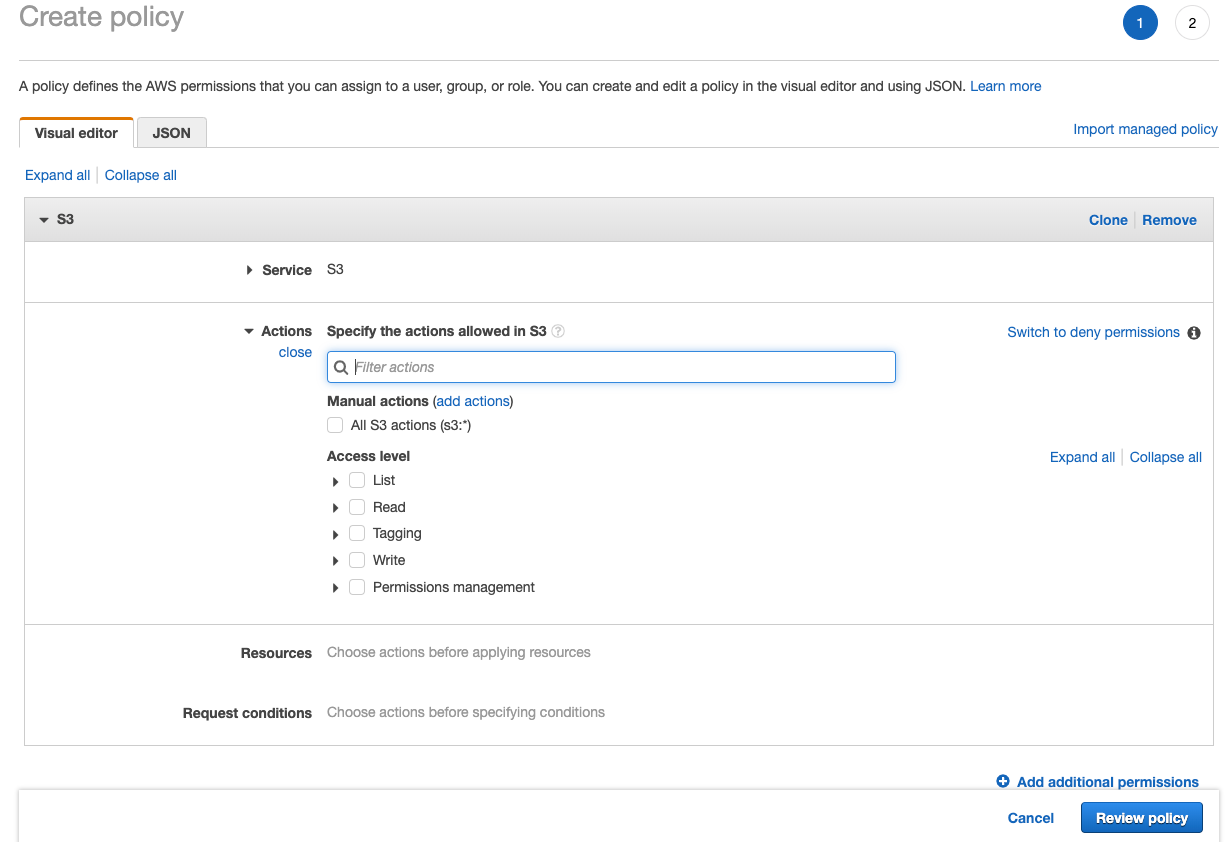
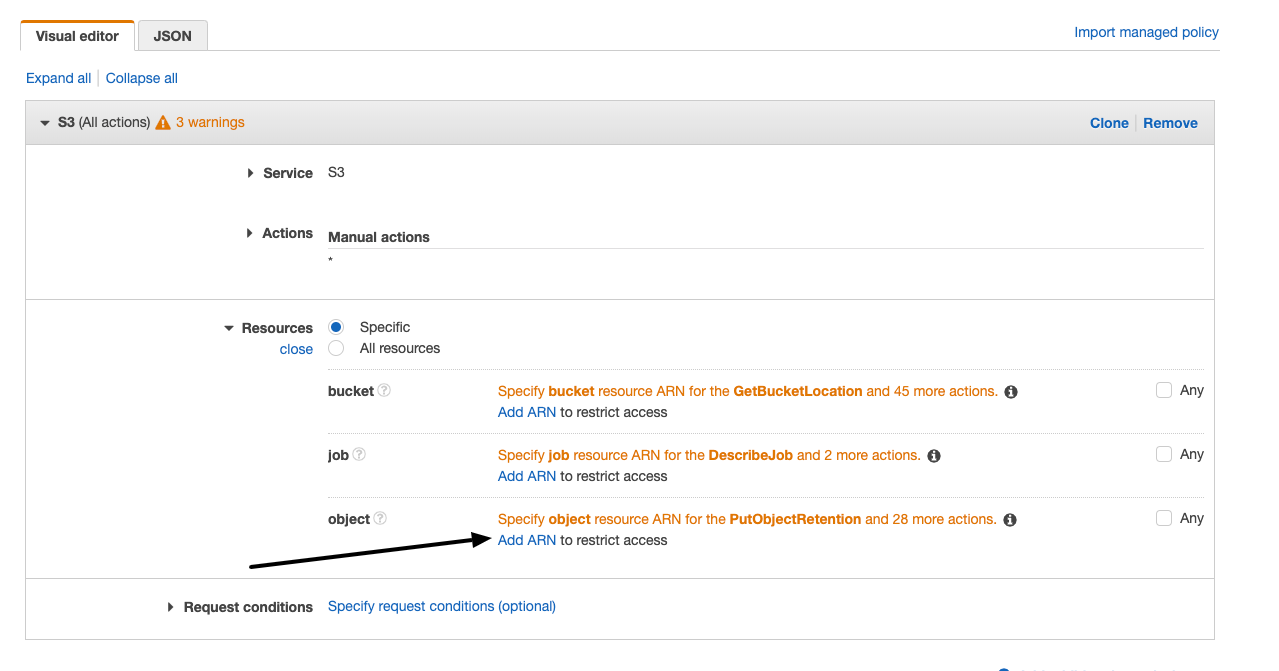
Then check "All S3 actions"
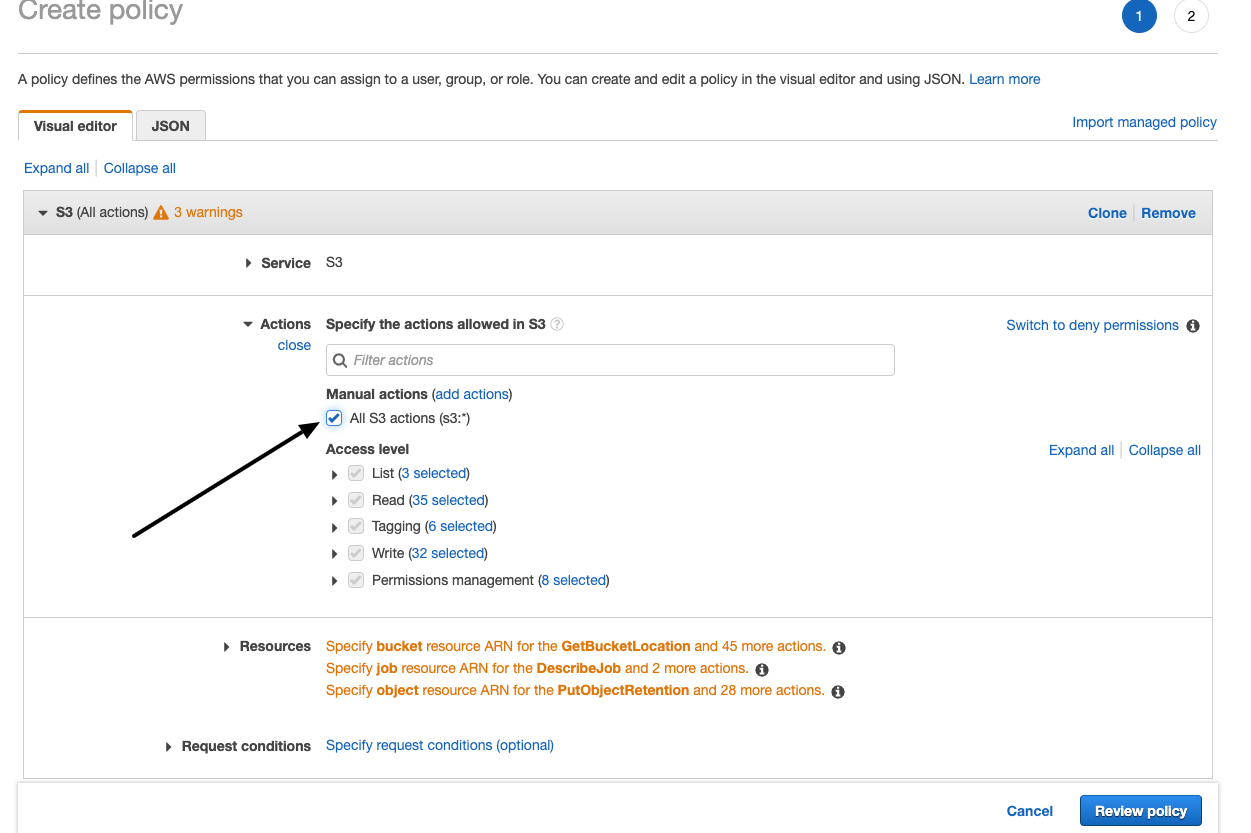
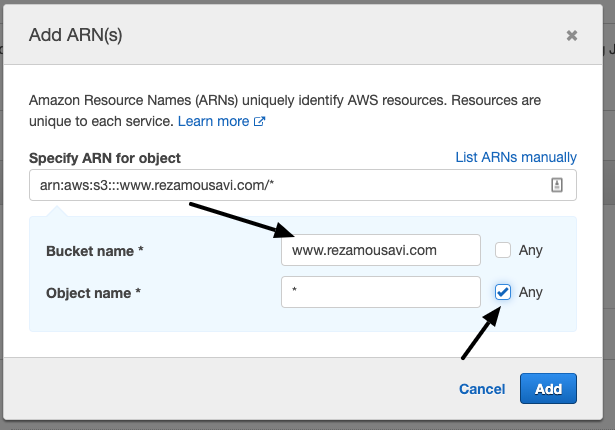
In the "Resources" section, click on ‘object’ and then click on the "Add ARN" link to enter your bucket name.
Enter your bucket name, (mine: www.rezamousavi.com) and * in object name, then click on the "Add" button.
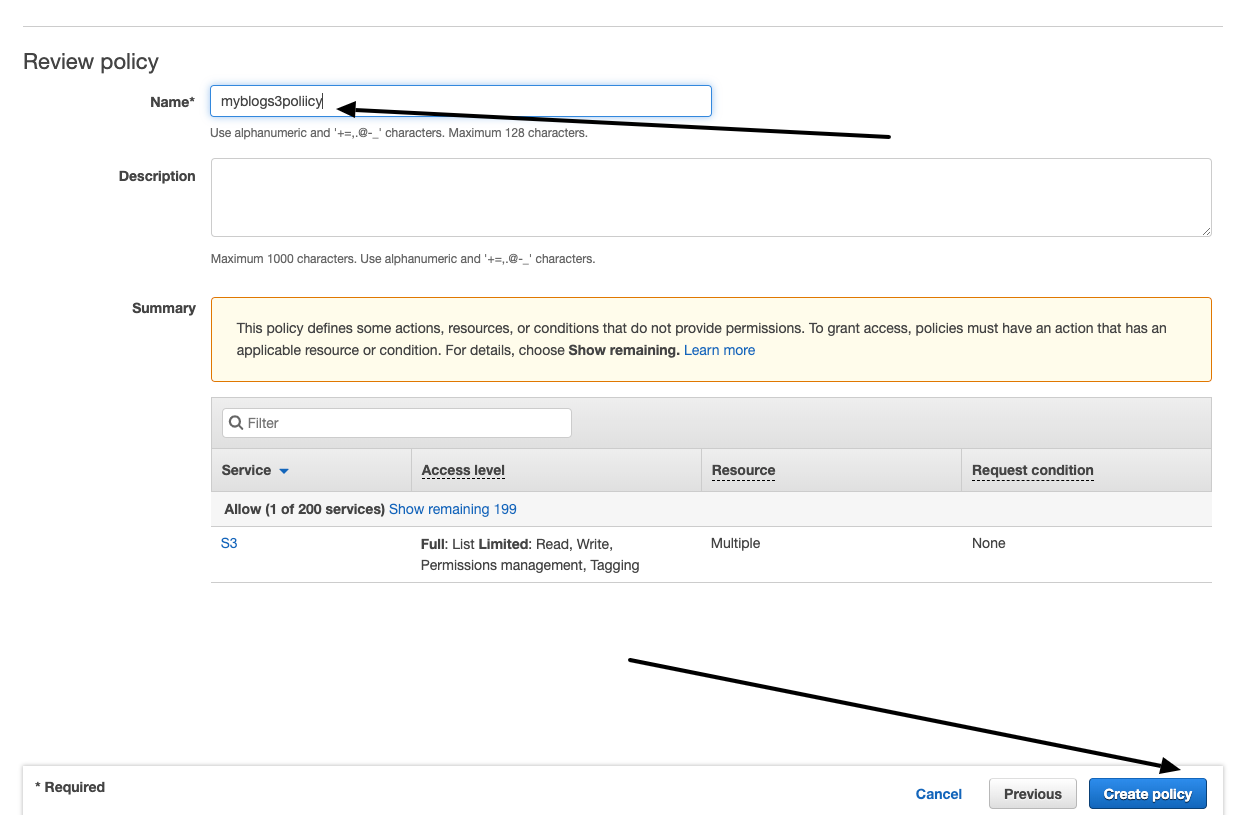
Then click on "Review Policy" at the end of the page and on the next page enter the policy name. Click the "Create Policy" button.
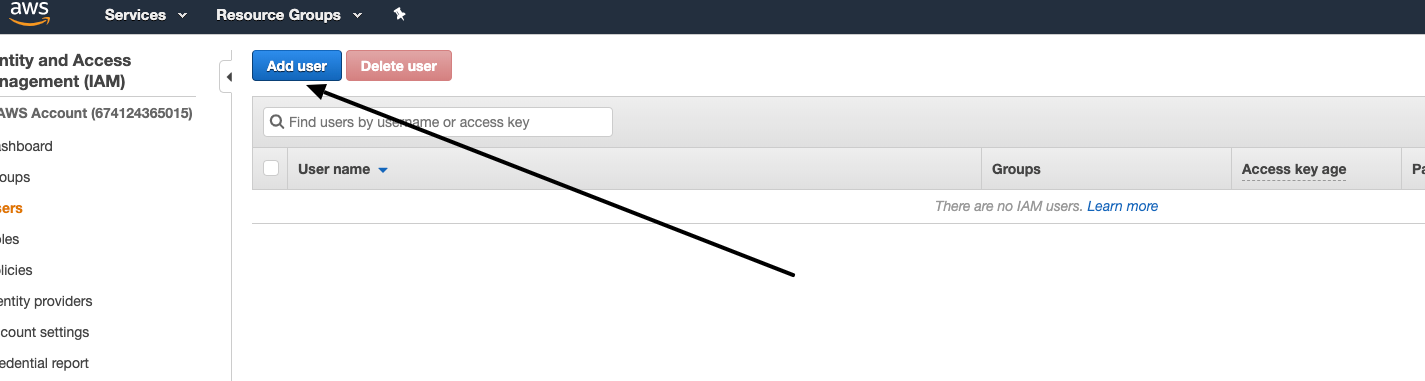
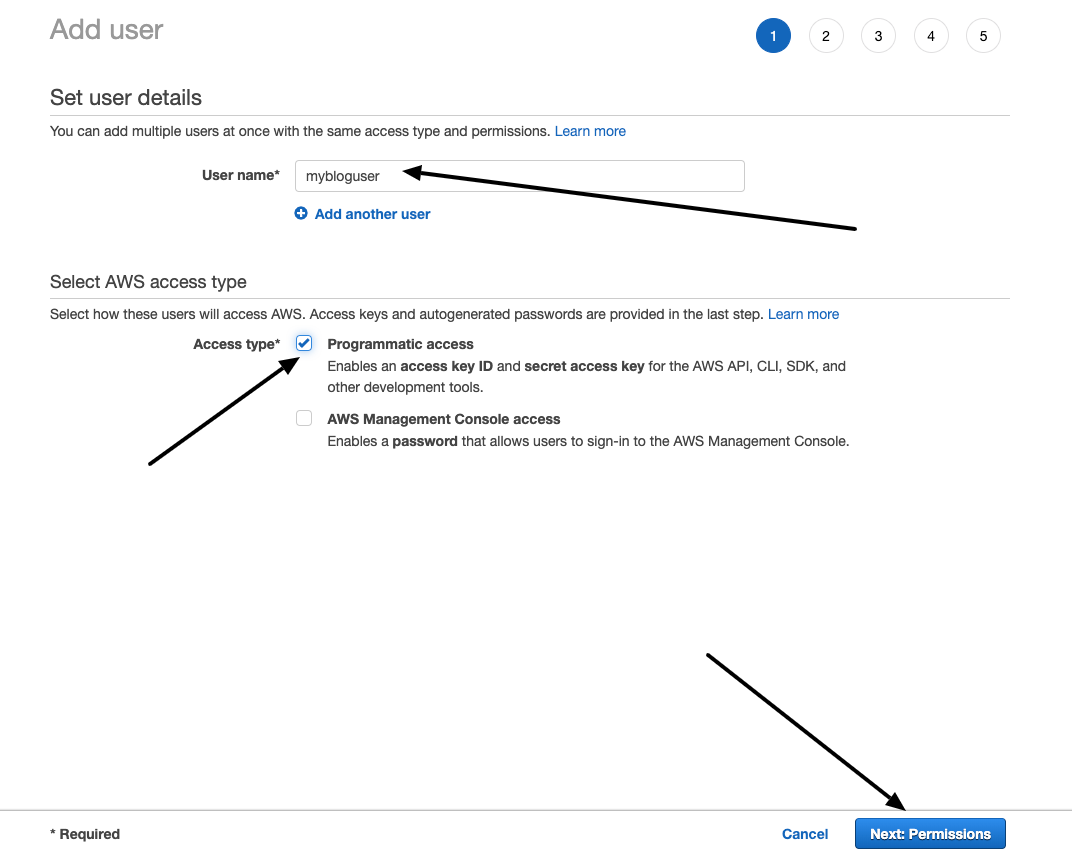
Head to the "User" section and click on "Add user".
Enter your username and check "Programmatic access" and then click on "Next: Permission" at the bottom.
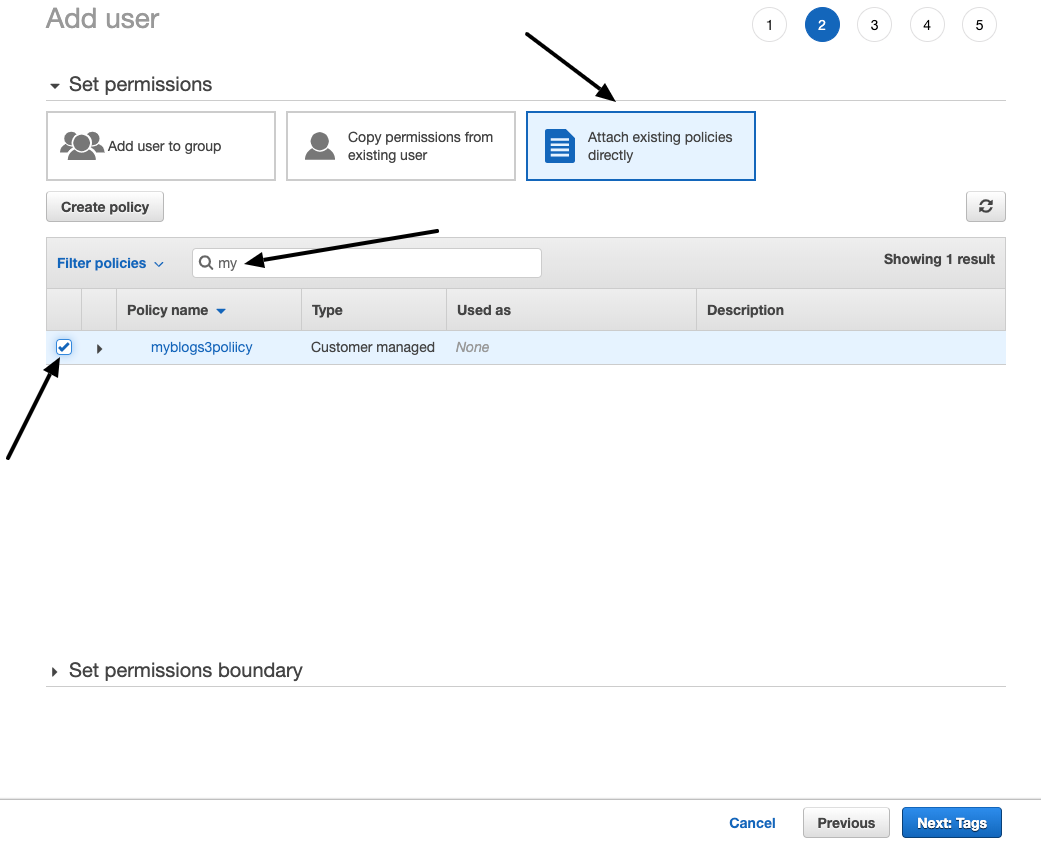
Click on "Attach existing policies directly," search for the policy name we created before, select it, and click on "Next: Tag."
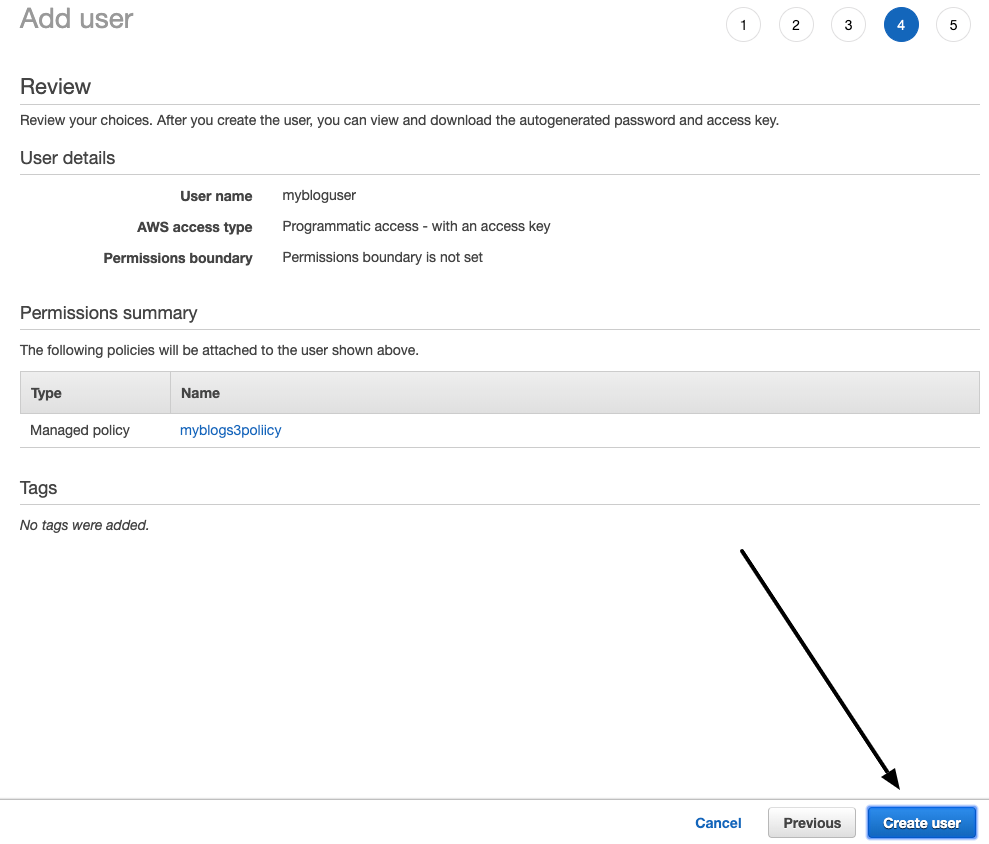
hen click on "Create User" button.
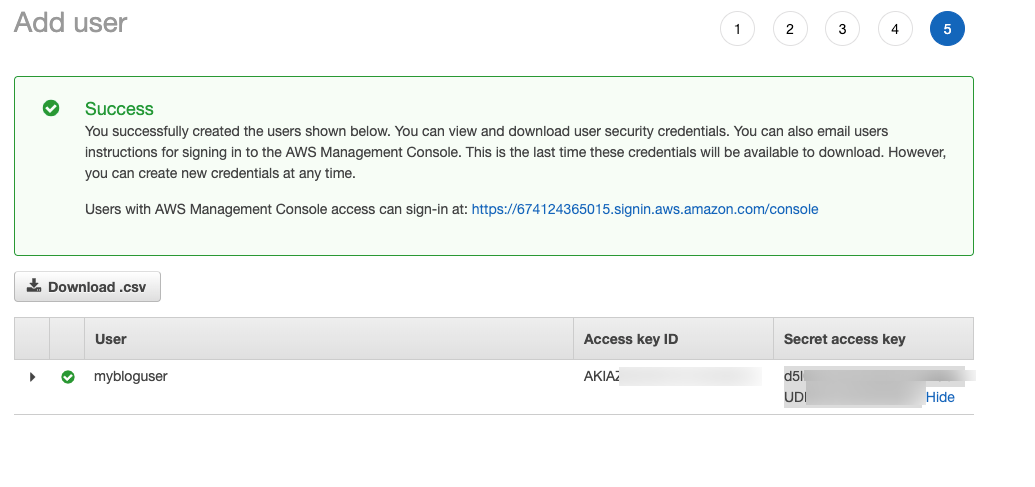
Copy and paste your "Access Key ID" and your "Secret access key" to a safe place; you’ll need them in our next steps.
Then use the following command in your command line to set your Access key and secret
aws configure
Now that you can upload our blog files automatically, we need to update our previous bash script and add this line to the end of that file.
aws s3 cp . s3://www.rezamousavi.com --recursiveAnd our full bash script should look like this:
#!/bin/bash
rm -rf web
node index.js
cd web
perl -pi -w -e 's{http://localhost:2368}{https://www.rezamousavi.com}g;' *.* `find ./ -name *.html`
aws s3 cp . s3://www.rezamousavi.com --recursive
So, in the future, next time we change something in our blog or add a new post, we just need to run this bash script. It will automatically delete the old folder, generate a new version, replace the URL's and finally upload them to our S3 bucket.
Eventually, I set up my new blog again, and I’m very happy about that because I spent several hours on the internet in research and testing. I think this method will be useful for others who want to do the same thing I did. I hope you find it helpful and I’ll be glad to hear your comments and opinions.
